Back when I made my toddler’s felt Christmas tree, I intended to share how I did it on this blog, but never got around to typing everything up. It seems like the tree is starting to gain some attention, so I’ll share the instructions for making it in a series of blog posts. This is the first one – the instructions for making the base of the tree.
Tree Size:
I opted to make a tree that is 17″ wide in diameter and 22″ high, with a slant height of 23.58″. If you wish to make a tree in a different size, I included the instructions for doing so at the bottom of this post. However, please note that the patterns provided in blog 2 for covering the tree will need to be altered or re-created entirely for your tree.
Supplies needed:
– Pencil
– Marker
– String
– Scotch tape
– Scissors
– Tape measure or yardstick
– A print out of this 129 degree angle in large
– A big bag of Poly-fill
– Thread, sewing needle, and sewing machine
– Newspaper, 5 double-fold pages (or a piece of paper at least 24″ wide x 59″ long)
– Piece of cotton fabric, of the same dimensions provided for the paper above (I used the remains of an old bed sheet – it doesn’t matter what this fabric looks like, since it will be hidden.)
Instructions:
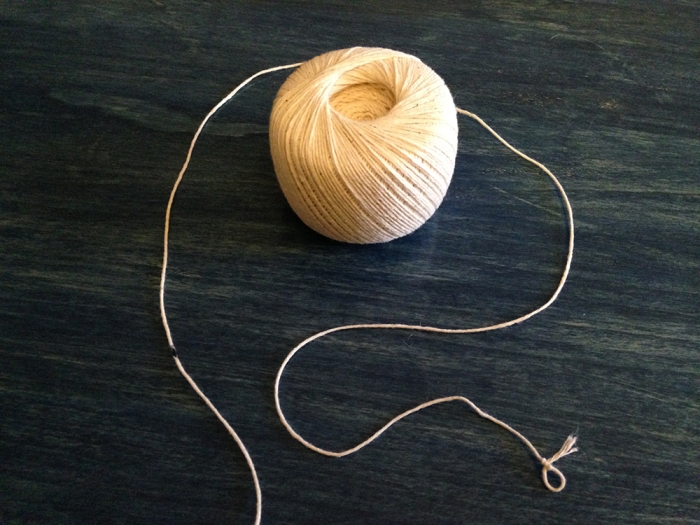
– Cut a piece of string at least 28″ long.
– Tie a loop of the string around the tip of your pencil. Lay the piece of string alongside your tape measure or yardstick. Hold the string taunt and use your marker to make a mark at 23 5/8″. (The mark on the string is pictured below on the left – it’s the black spot on the string.)
– Unfold 4 pages of newspaper. Lay 3 of them in a horizontal row and tape the edges together. Unfold the 4th page and place it at the top, just slightly to the left of the center fold (see picture below). Tape in place.
– Take the print out of the 129 degree angle and place it at the bottom of the newspaper, roughly centered. Line up the right edge of the angle with the bottom edge of the newspaper.

– Watch this video between 50 seconds and 1:25 minutes to get an idea of the action you’ll take in the next step. Like the lady in the video, you’ll be pulling the string taunt and using it to draw an arc – except you’ll use the angle as a guide rather than the edges of the paper.
– Place the marked spot on your string at the intersection of the angle and use your right thumb to hold the string tightly. Pick up the pencil in your left hand, and pull the string taunt. Line up the string with the left side of the angle. Without drawing on the newspaper, move the string from the left of the angle to the right in an arc and make sure that the newspaper pieces will cover the arc you need to draw. If not, adjust things by moving the printed angle. Once you are able to make an arc that stays on the newspaper, tape the printed angle to the newspaper at the top corners of the page. Don’t tape the bottom edge to the newspaper.
– For this step, you may wish to tape down your newspaper or have someone else help you hold it still. Now, with pencil to paper, draw an arc across the newspaper starting on the left and going until your run into the bottom edge on the right. Don’t worry about being a perfectionist – if the paper bunches up a little, just lift the pencil, let the paper unbunch, and then continue making the arc. Once I was about halfway through the arc, I had to stop every 6 – 8 inches and lift my pencil. While it’s fine if your arc is a little off here and there, don’t let the paper bunch up too much, because then your arc will get really off.
– Lift up the bottom side of the print out for the angle and mark the newspaper with the point where the angle intersects. Next, gently remove the print out of the angle from the newspaper. Then, using your tape measure or yardstick as a guide, draw the line for the left side of the angle onto the newpaper.
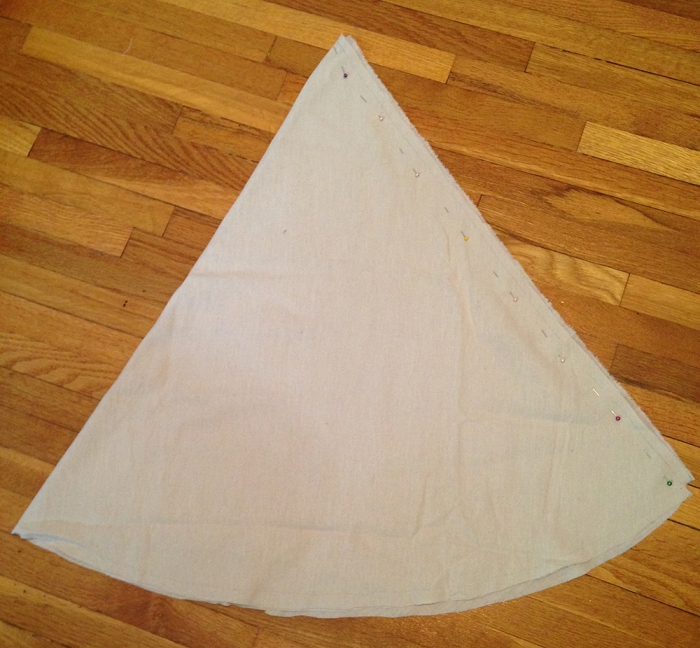
– Cut out the angle you’ve drawn onto the paper. You should have a fan shape, roughly 24″ tall by 40″ long, that looks like this:

– Roll the shape into a cone and loosely tape the straight sides together with tape.

– Stand up the cone and eyeball it. It should measure 22″ high and be pretty straight.

– If the cone looks good, great! You have your pattern piece for the tree. Gently untape it and set the paper aside for now.
– Now you’ll make a 18″ round pattern piece for the base of the cone. Lay the string along your tape measure again, and, while holding the string taunt, mark a spot on the string at 9″ with your marker.

– Lay down the remaining piece of newspaper, keeping it folded. Place the string’s mark in the center of the paper and hold it in place with your right thumb. Then, using a pencil and holding the string taunt, draw a 180 degree arc starting at the left bottom of the page and ending on the right. (Pick up your pencil periodically if you need to let the page unbunch. Also, if you’re using the picture below as a guide, please note that the string is laying in the wrong spots. The black mark should be in the center, where the knot is.)

– Use your scissors to cut through both layers of paper, which will unfold into an 18″ circle. You now have the pattern piece for the base of the tree!

– Now lay out your fabric and place the pattern pieces on it.

– The top part of the tree does not include a seam allowance, so you’ll need to draw one on all sides of the pattern. I drew a 1/2″ seam allowance on all sides, as pictured below:

– Cut the piece for the tree, including the seam allowance, out of the fabric.
– Now place the pattern for the tree base onto the fabric and cut it out. This piece includes a seam allowance, so you don’t need to add one.

– Pin the straight edges of the tree together (right sides together, if your fabric has a right side) and sew using a 1/2″ seam.
– Now pin the base to the tree, with right sides together (I find it easiest to pin and sew from within the inside of the circle). Sew both pieces together leaving a 6 – 8″ opening somewhere in the circle – you’ll use this opening to insert the stuffing into the tree.


– Use the opening to turn the tree inside out, so that the seams are now inside the tree. The picture below is bad, but you can kind of see the opening I left at the bottom right, where the seams join.

– Fill the tree with the stuffing. Mine came out rather lumpy, which at first I wasn’t happy about. But the more I thought about it, the more I liked it. After all, trees aren’t straight up and down and perfectly symmetrical.
– Once the tree is adequately stuffed, pin the opening and sew it shut by hand using a whip stitch. This will all get covered with felt, so don’t worry if it doesn’t look perfect.

– And this is what the final result looks like! At this point, it’s basically a tree-shaped pillow. 🙂
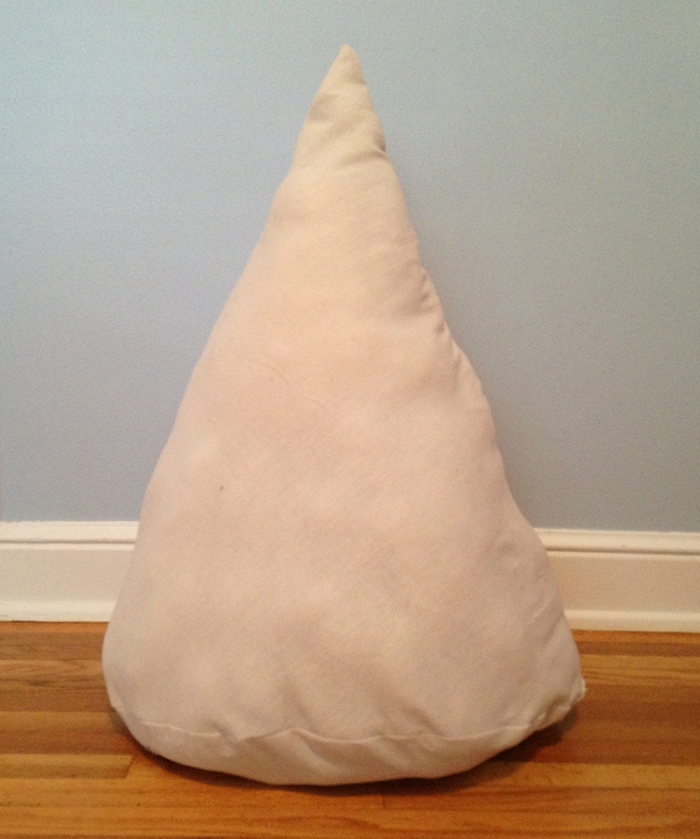
That’s it for making the base of the tree. In the next post for this series, we’ll work on covering the tree with leaves and a base.
Instructions for Making a Tree in the Size of Your Choice:
To make a tree in the size of your choice, you’ll need to do a bit of math.
First, you’ll need to pick a height and a diameter for the base.
Next, figure out the radius of the base (which is half of your diameter).
Then, you’ll figure out the slant height of your cone using the Pythagorean Theorem. If it’s been awhile since you’ve done geometry, don’t worry – Google’s got your back with this nifty Pythagorean Theorem calculator. Just enter your height in leg A and the radius of the base in leg B. Google automatically calculates the slant height in field C.
Now you’ll need to determine the angle you’ll use to create your tree. To do so, multiple 360 x your radius, and then divide it by your slant height. (For my tree, that was 360 x 8.5, divided by 23.58 = 129.77.) Finally, Google whatever your angle is by searching for something like: “129 degree angle” or “80 degree angle.” In almost all cases that I tested, the first search result was from http://etc.usf.edu/clipart, a website that offers printable versions of angles. Download the angle of your choice and follow the instructions above for making it. Please note – you’ll need to adjust all measurements in the instructions above, like the length of the string, where you place your marks on the string, and how much newspaper and fabric you’ll need.


